Fruit Flies
Photographing Fruit Flies
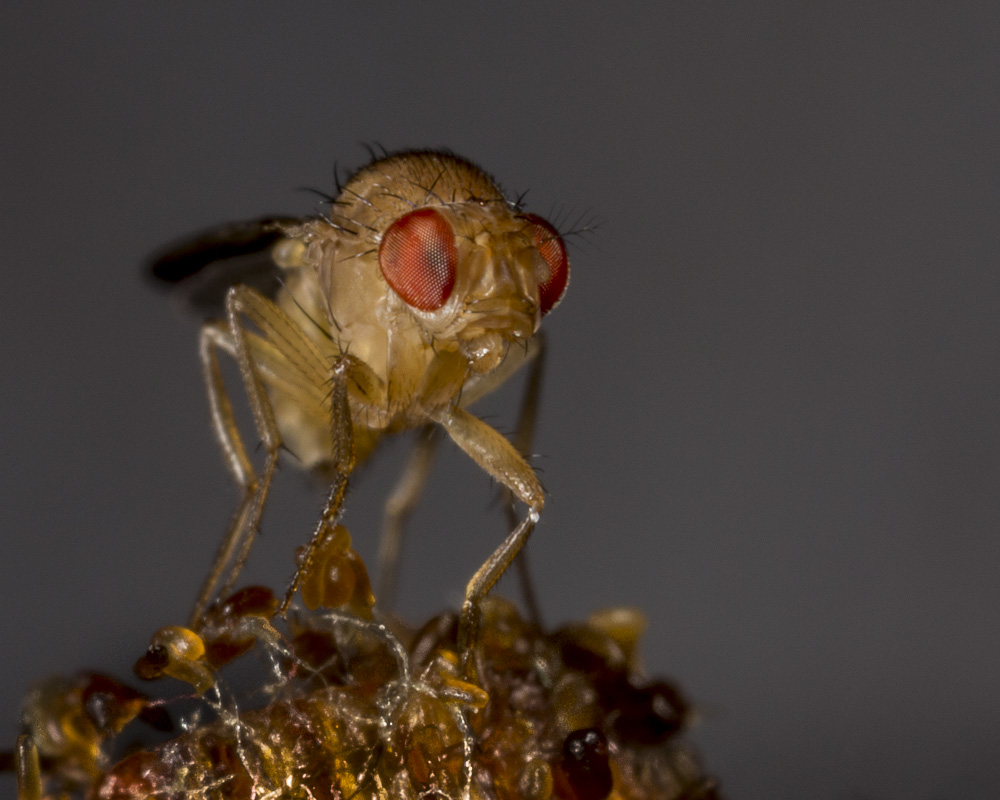
We had a plague of fruit flies. That meant that they had found a good food supply. I went hunting for it. With three kids and two dogs in the house, it wasn’t surprising that there was a hidden stash of rotting organic material. I cleaned it up. There were way too many flies to kill, and I knew that with their food gone, they’d die off in a few days. In the meantime, they would make good close-up subjects. These flies were about ½ as big as a common housefly, so they would need a lot of magnification. I noticed that one or two would often land on some decorative small sticks sitting in a jar on the bathroom counter. That was a prime location, conveniently located, with the counter top available for supporting my elbows as I held the camera.
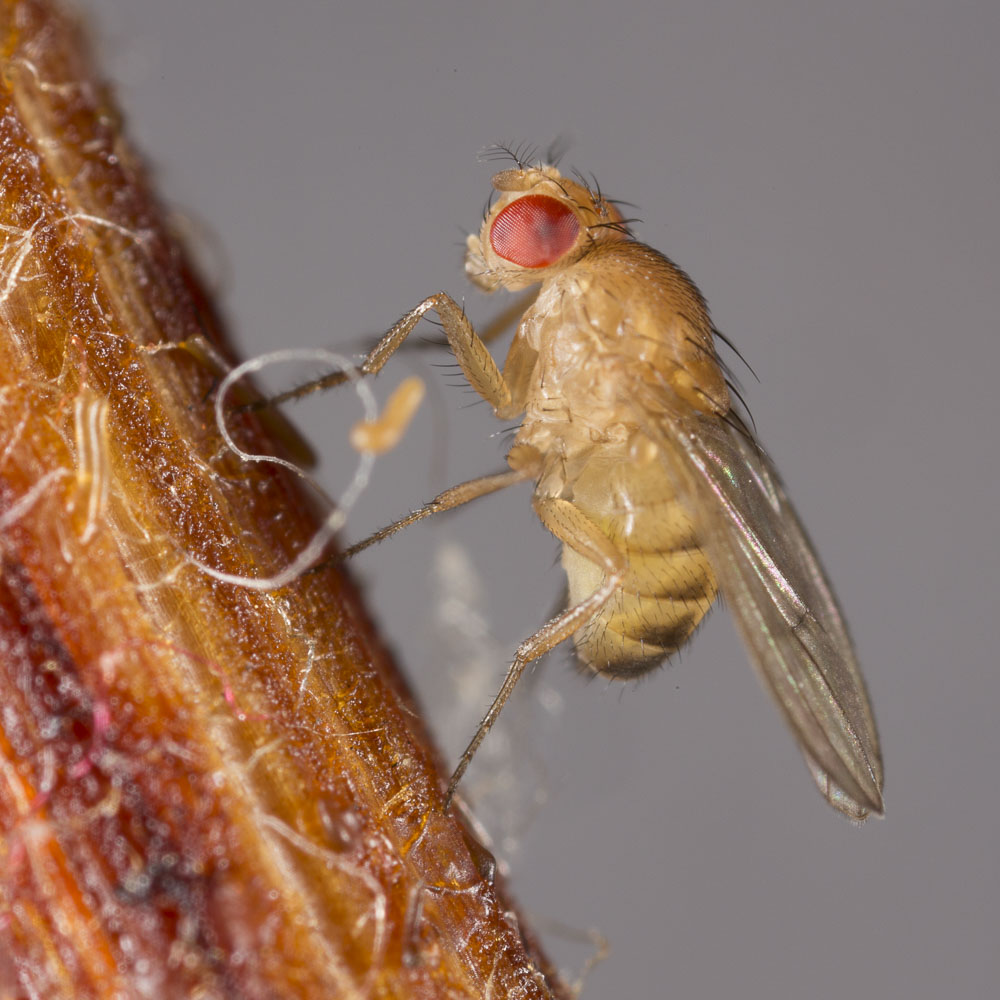
I used a Canon 5D Mark III camera with Canon’s ultra-close-up MP-E 65mm f/2.8 macro lens. This lens is a favorite of insect photographers. Although it won’t work at all at normal distances, it’s great for close-ups. It provides magnifications from 1x to 5x. It has no auto-focus. The usual way to work with the lens is to set the magnification you want, then move the camera forward and backward until the subject comes into focus. I set the lens for about 4x magnification, and used apertures of f/11 and f/16 for most of the shots. For lighting, I used a Canon MT-24EX Macro Twin Flash.
The sticks with the flies were just in front of the bathroom mirror. I didn’t really want reflections, so I taped paper onto the mirror as a background. I first tried white paper, didn’t like the results, and switched to black construction paper.
Then I began photographing. For this sort of close-up, I prefer to use manual exposure. I want to select an aperture that gives some depth of field, and shutter speed is irrelevant when exposure is controlled by the flash. So I started snapping. After each shot, I checked the resulting histogram, adjusting flash intensity until I got a histogram that showed correct exposure.
Once I had the exposure dialed in, I could concentrate on the flies. Live flies move a lot. Even when not flying away, they walk. I had to be able to follow them, so I hand-held the camera instead of using a tripod. I rested my elbows on the counter for stability, and slowly moved the camera forward and back. When the fly’s eye looked sharp, I clicked the shutter.
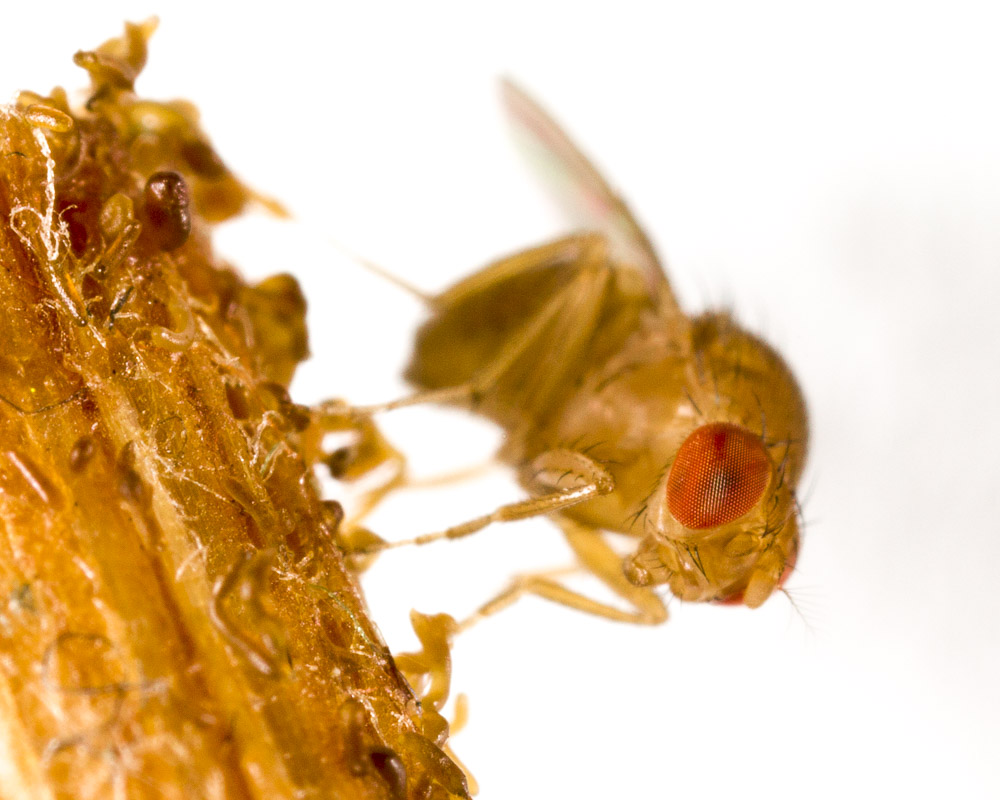
At 4x magnification, it’s not possible to get even something as small as a fly completely in focus. One part or another will be sharp, but not the whole insect. I usually like to focus on the eye closest to the camera, because the eyes are generally the strongest point of interest in an animal. But if I’m trying to emphasize something else, I’ll focus on whatever part is most interesting. Angle of view can help. Photographing an insect from the side gives a reasonably sharp view of the whole body from front to back, whereas photographing it head-on guarantees that at least part of the creature will be blurred. (There’s a technique called focus stacking that gets around the depth of field problem, but it only works with subjects that aren’t moving. We’ll be discussing focus stacking later.)
Small apertures help, but aren’t a cure-all. The optical effect known as diffraction starts to kick in as the aperture gets smaller, and adds blur of its own. The result is an image that has greater depth of field, but less crisp overall.
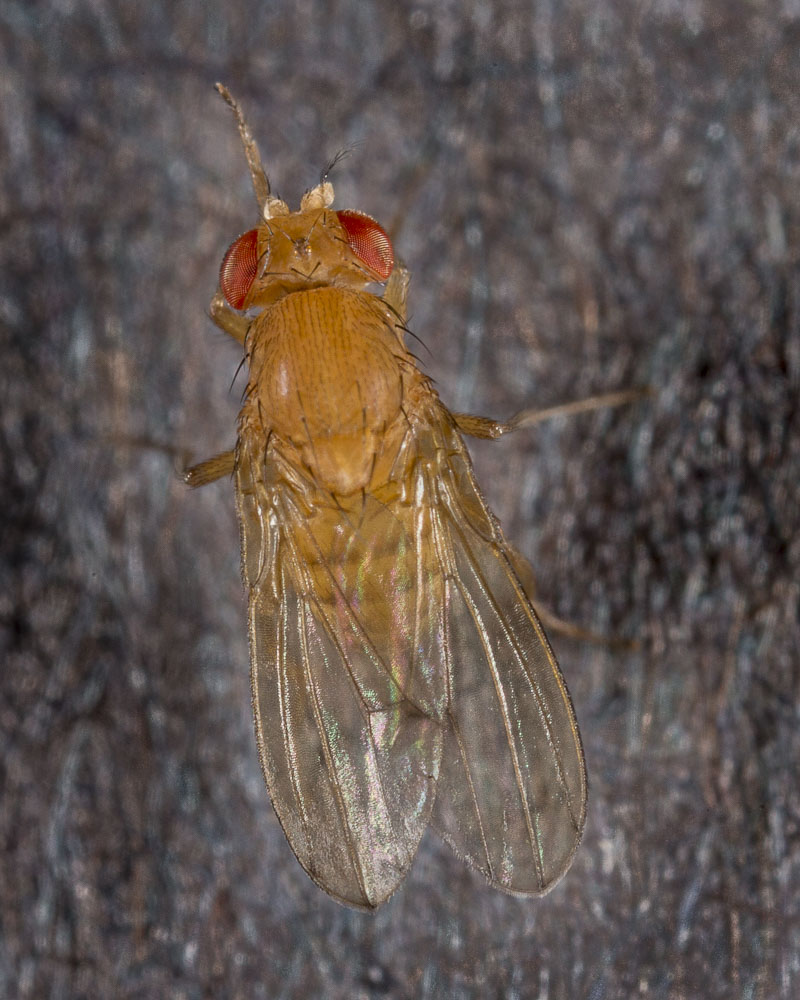
When the flies left the stick and landed on the black construction paper, I had a chance to photograph them from the top. This is a significant angle, because features like the pattern of wing veins are useful for identification of species. It’s also the angle that we usually view the insects from.
After photographing with the Canon setup, I thought I’d see whether I could get anything usable from a mirrorless system camera, the Olympus OM-D E-M5. I attached an Olympus 60mm macro lens and a couple of extension tubes to get as much magnification as possible. Olympus doesn’t have a macro flash comparable to the Canon MT-24, so I tried just using room light. This was a real challenge. To get a halfway reasonable shutter speed I opened the lens up to f/2.8 and set the ISO to 3200. Using manual focus, I’d rock back and forth, just as with the Canon, firing at the point where focus looked OK. I’d hold the shutter release while the camera fired off a number of shots. If luck was with me, in one of those shots the camera wouldn’t be moving, and would be focused.
There’s one advantage to using room light, or any continuous light source rather than a flash. I could shoot tons of frames very quickly, increasing my chances of getting one in focus. With flash, shooting speed is limited because the flash takes time to recycle.
I made a lot of blurry photos, and a few sharp ones. Here’s the best of the bunch.

As you can see, the high ISO resulted in a sharp but noisy image. The individual ommatidia (parts of the compound eye) are visible. The photo above is a cropped and processed version. The photo below shows the image before processing.

The final image has been darkened, especially the stick, and I’ve only used a portion of the original. I processed the file using Lightroom. The controls I adjusted include exposure, contrast, clarity, sharpening and noise. In addition, I applied local darkening to the stick.
I’m happy with the results of the fly shoot. I have a few images I like. My wife is happy too, because the flies are gone.
Note on Shutter Speed and Flash Exposure
Exposure using flash is a little different from the usual f/stop and shutter speed controls that you’re probably used to, especially if you’re using the flash on a manual setting. Manual means you set the exact amount of light for the flash to produce, instead of using one of the auto modes such as Canon’s E-TTL or Nikon’s i-TTL. The automatic modes measure exposure and set flash levels based on the metered levels. Manual mode seems like more trouble, but in macro it’s often easier to work with.
So let’s suppose you have manual flash levels set. The photo will be exposed by two light sources. One is the flash, obviously, the other is the non-flash light that’s present in the situation. XXXXXXXXXXXXXXXXXXXXXXXXXXXXXX